
 What could be more enjoyable than spending an evening in the
countryside with friends around a fire? Pit firing your pottery gives
you the perfect excuse. You will need hole in the ground, sawdust,
firewood, newspaper and some chemicals to stain the clay.
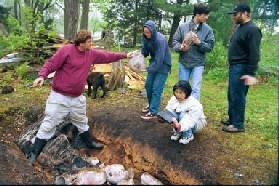
 It is best to pack the pit before dusk so you can see what you are doing.
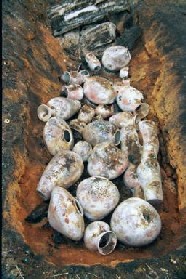
The bottom of the pit should be lined with about 3 inches (10cm) of sawdust. Arrange the pieces on the sawdust. The part of the pot in contact with the sawdust will be black. You may want so sprinkle some chemicals on the pots at this point. I'll talk more about chemicals later.
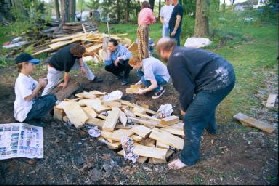
Next pack the pit evenly with firewood and some tightly crunched balls of newspaper until the pots are completely covered as in the picture above. When packing the wood, think about how it will settle as it burns. Take care to avoid situations where the burning wood pile will collapse suddenly and break the pots underneath. The wood should be softwood (e.g. orange boxes and pine), so that it burns evenly and completely, and is not heavy so that pieces which fall down do not break the pots.
Very important Protect you skin by wearing disposable rubber gloves. Make sure nobody is downwind, otherwise they will be breathing chemical fumes which could be poisonous.
Pots with smooth surfaces can be made more shiny by polishing with
clear floor wax.


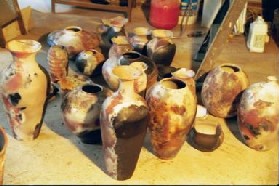
Most of the colours in these pictures are due to copper and iron. The form of copper or iron determines when it should be thrown in.
Cracking can be reduced several ways. Make stronger pots. Use a clay body that responds well to heat shock (ask if the clay is suitable for raku firing). Do the pit firing in warm weather so the fire cools more slowly.
You can strengthen cracked pots with polyurethane varnish. Varnish the inside by pouring the varnish into the pot and pouring it back into the tin using the same action you would with glaze. Paint the outside with varnish normally.
For some reason, people always want to throw sticks and beer bottles into the fire. Don't. If the beer bottles fail to smash your pots, the glass might melt and stick to the piece. You will have an ugly fused lump (complete with bits of ash) or, more likely, the glass will contract at a different rate to the pot and pop off, leaving an ugly scar.
Don't cover the fire with sand. This causes massive reduction which will turn the pots completely black.